Managing Product Inventory
Before you can track inventory, you need to enable stock management globally. Go to WooCommerce → Settings → Products → Inventory. Tick the Enable stock management checkbox. This unlocks stock-related fields on individual products and enables low/out-of-stock notifications. You can also set a Low stock threshold (default is 2) and choose whether to hide out-of-stock items from the catalogue.
Open any product in the editor and scroll to the Product data panel. Click the Inventory tab. Here you can enter a SKU (stock keeping unit — your unique product code), tick Manage stock to enable quantity tracking, then enter the Stock quantity. Set Allow backorders to control what happens when stock hits zero. The Low stock threshold can be set per-product to override the global setting.

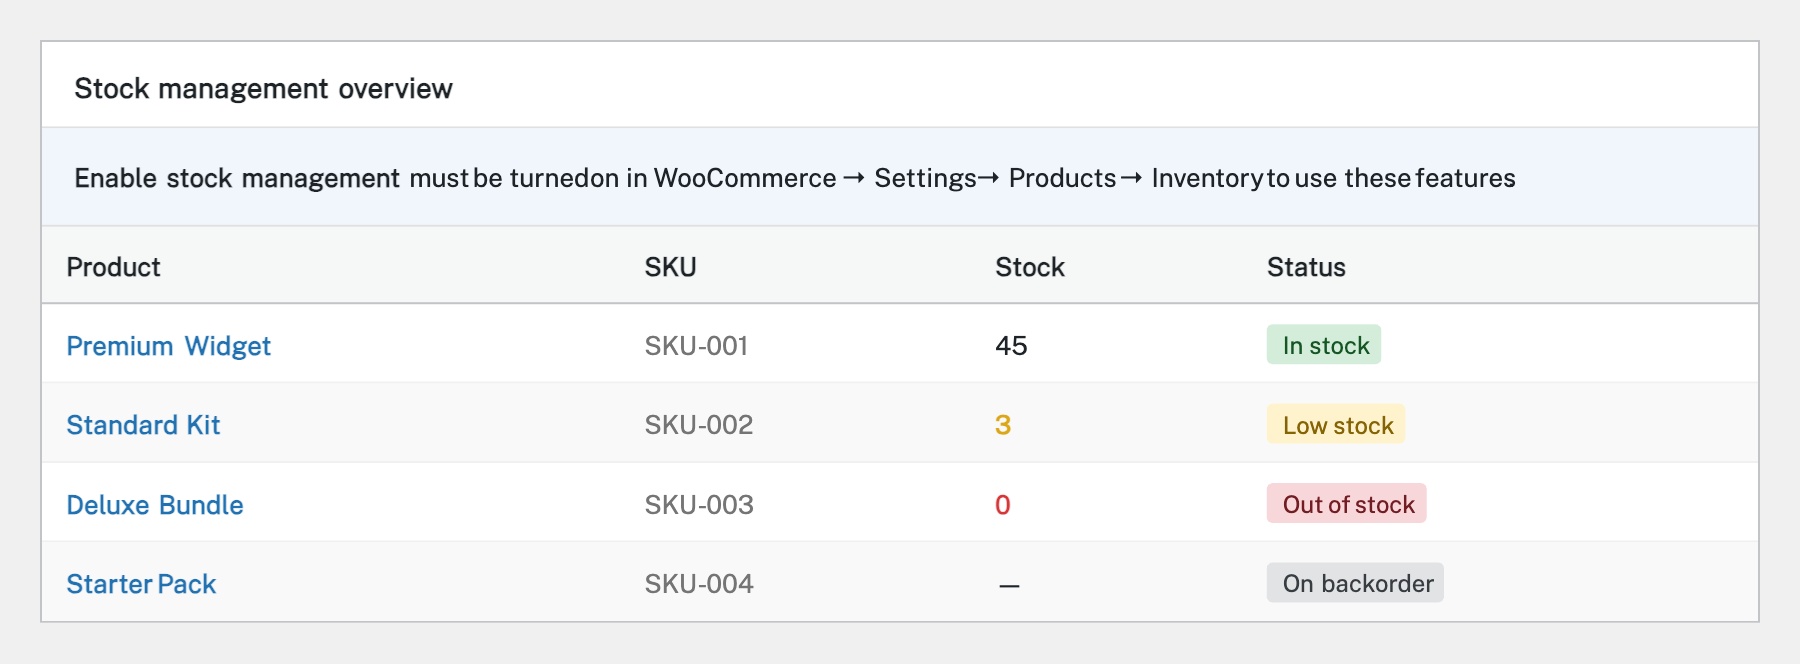
WooCommerce uses several stock statuses: In stock (available for purchase), Out of stock (not available — the product can be hidden or shown with an ‘out of stock’ label), On backorder (customers can order but it’s not in stock yet), and Low stock (below your threshold — triggers a notification). When stock management is enabled, these statuses update automatically as orders come in.
WooCommerce sends email notifications when products hit low stock or go out of stock. Configure these in WooCommerce → Settings → Products → Inventory. Set the Notification recipient email, Low stock threshold, and Out of stock threshold. You’ll receive an email each time a product crosses these levels, giving you time to reorder.
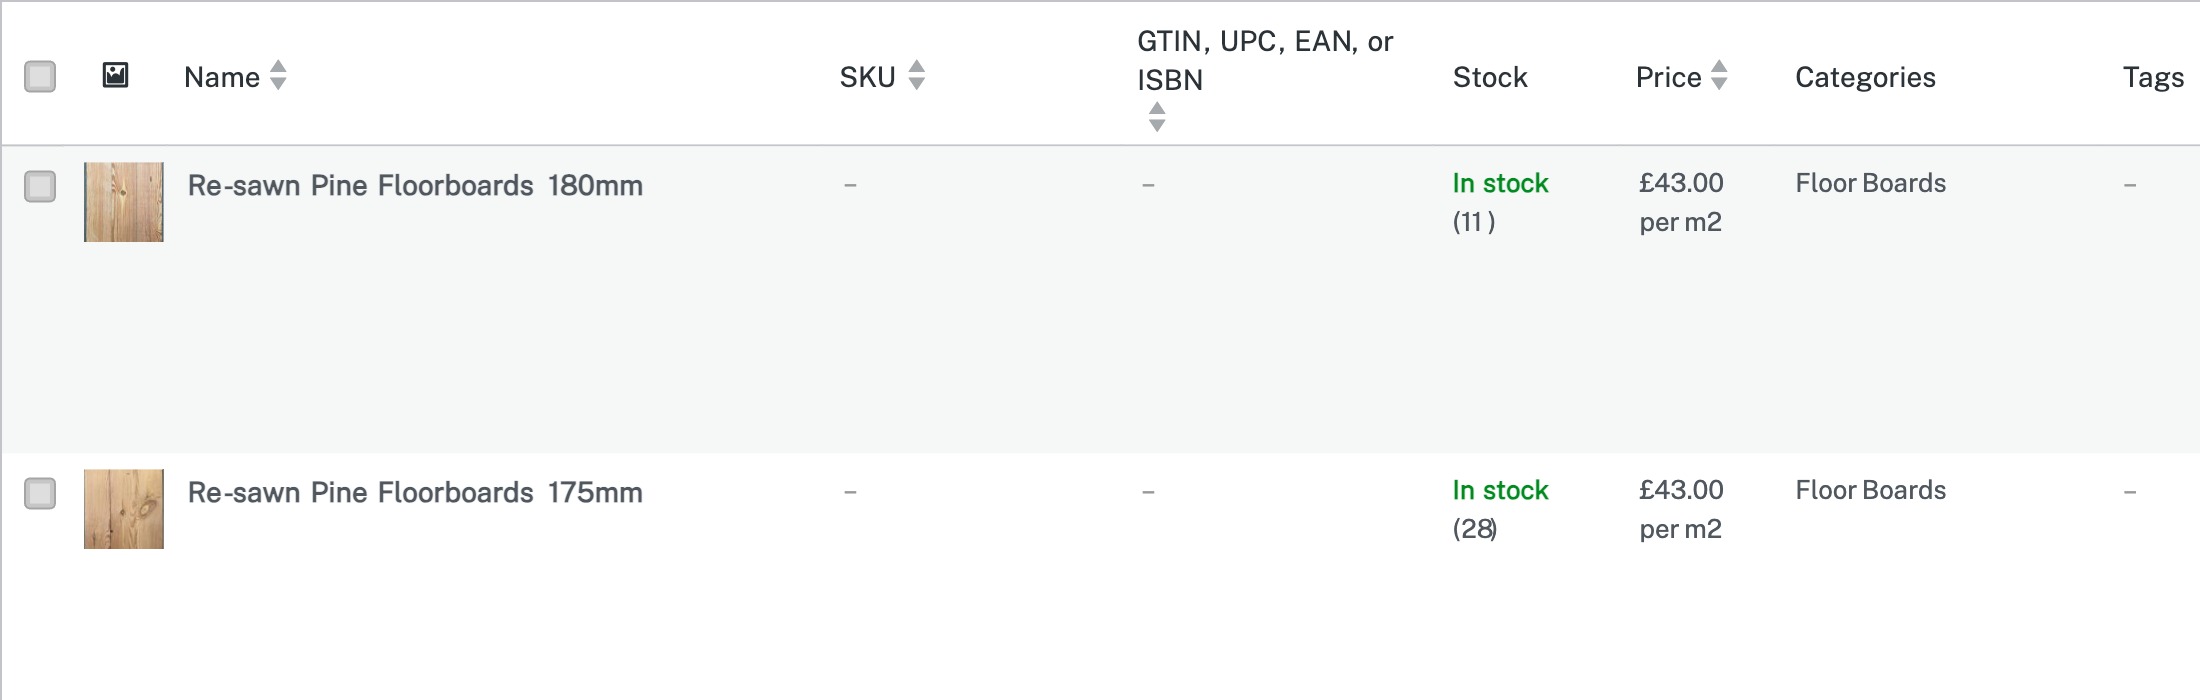
For a quick overview of stock across your entire catalogue, go to Analytics → Stock from the admin sidebar. This shows all products with their stock status and quantity in a sortable, filterable table. You can filter by In stock, Low stock, Out of stock, or On backorder to quickly find products that need attention. The Products list also shows a Stock column if stock management is enabled.
Completed
If you are still experiencing issues, our support team is here to help.
Was this article helpful?