Clearing Your Website Cache
Unlike your browser cache (which is stored on your computer), your website cache is stored on the server that hosts your site. Your website is hosted with Kinsta, which uses advanced server-side caching to ensure your pages load as quickly as possible.
When you make changes in WordPress — editing a page, publishing a blog post, or updating an image — the cached version of that page may still be served to visitors until the cache is refreshed. This is why your changes might not appear immediately.
Kinsta’s cache typically refreshes automatically, but sometimes you’ll need to clear it manually, especially after making significant changes.
The quickest way to clear your website cache is directly from the WordPress admin bar:
- Make sure you are logged in to WordPress
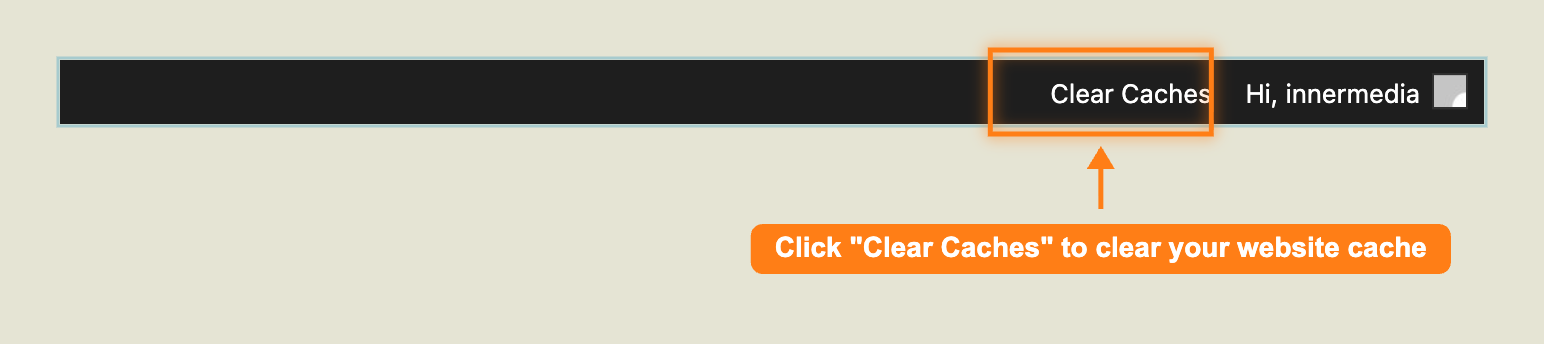
- Look at the admin bar at the very top of the screen (the dark bar that appears when you’re logged in)
- Click Clear Caches in the top-right area of the admin bar
- You will see a confirmation message that the cache has been cleared
This clears the entire site cache. Any page a visitor loads after this point will be freshly generated from your latest content.
For more control over cache clearing, you can use the Kinsta Cache plugin in your WordPress dashboard:
- In the WordPress sidebar, click Kinsta Cache
- You will see a simple interface with cache management options
- Click the Clear All Caches button to purge the entire site cache
- Wait for the confirmation message to appear
The Kinsta Cache page also shows you cached URLs and gives you the option to add custom URLs to automatically purge when content is updated.
You should clear your website cache when:
- Changes aren’t appearing — you’ve updated content, but the live site still shows the old version
- After a design update — InnerMedia has deployed a theme change or new feature
- Images look wrong — you’ve replaced an image but the old one still shows
- After plugin updates — some plugin updates require a cache clear to take effect
- Forms aren’t working correctly — cached pages may serve outdated form markup
In most cases, Kinsta’s cache will refresh automatically within a few minutes. If you need changes to appear immediately, clearing the cache manually ensures visitors see the latest version right away.
If you’ve cleared the website cache and changes still aren’t appearing:
- Clear your browser cache — your browser may still be showing its own cached copy. See our guide on Clearing Your Browser Cache
- Try a different browser or incognito/private window — this rules out browser caching entirely
- Check you’ve published the changes — make sure you clicked Update or Publish in WordPress, not just saved a draft
- Wait a few minutes — sometimes CDN caches take a short time to propagate
If none of the above resolve the issue, please contact InnerMedia support and we’ll investigate further.
Completed
If you are still experiencing issues, our support team is here to help.
Was this article helpful?