INNERMEDIA
Contact Support
Support Base
Pages & Content
How to Set Up a Site Alert Popup
Step 0 of 5 completed
1
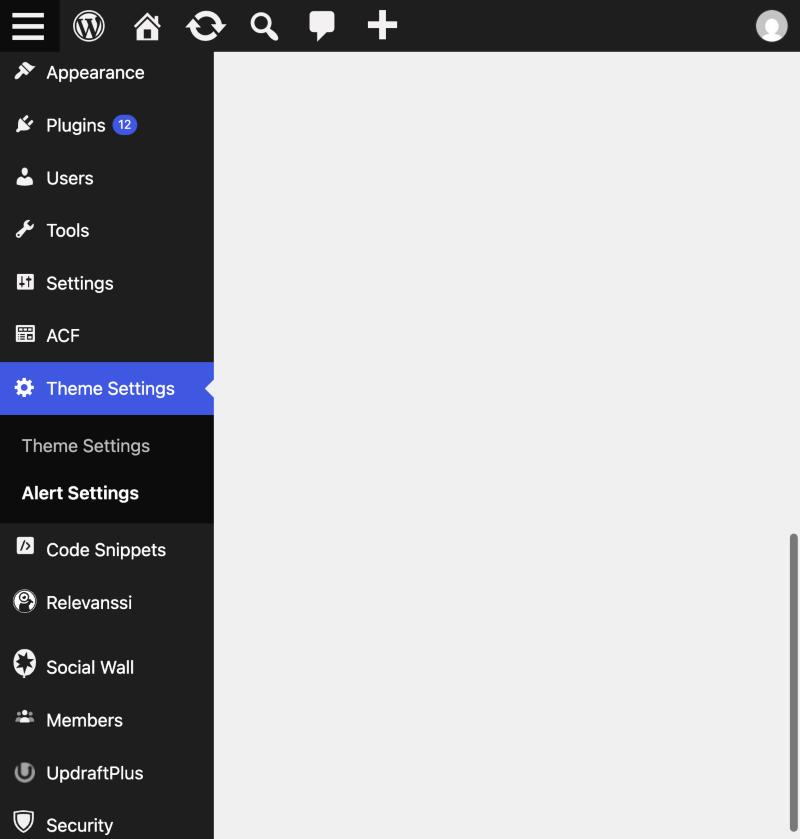
Open Alert Settings
- In the WordPress menu on the left, go to Theme Settings → Alert Settings.
- This opens the Site Alert page.
2
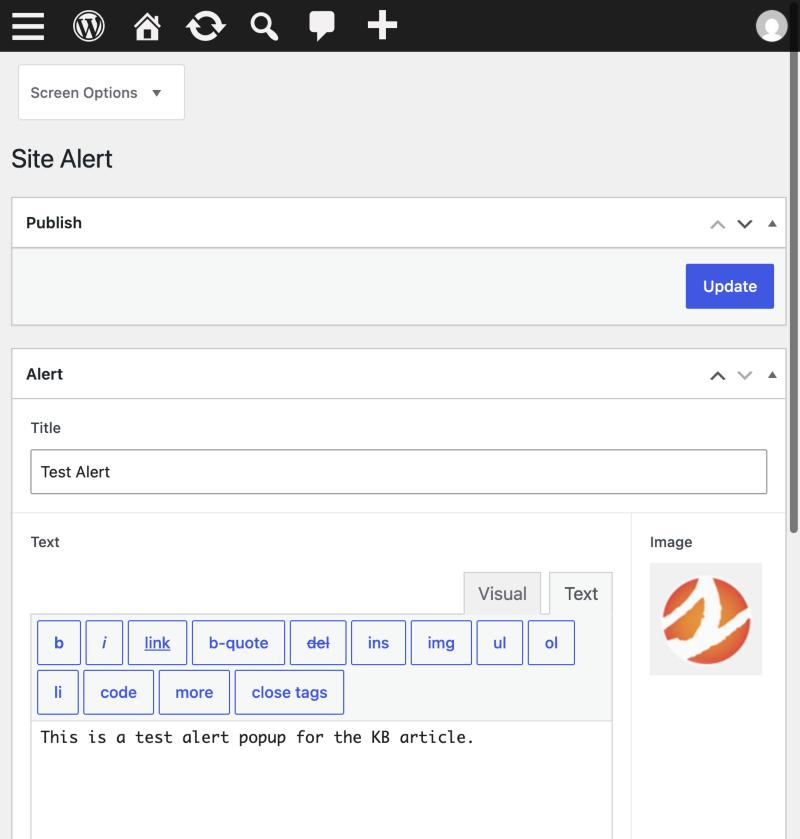
Add your title, text and image
- Enter a Title for the alert.
- Type your message in the Text box. You can switch between the Visual and Text tabs to format it.
- Click the Image box to choose an image from the Media Library, if you want one to show with the alert.
Pro Tip
An image with very different proportions to the space it appears in may look cropped. If it does, contact Innermedia support for the recommended size. 3
Choose the Alert Status
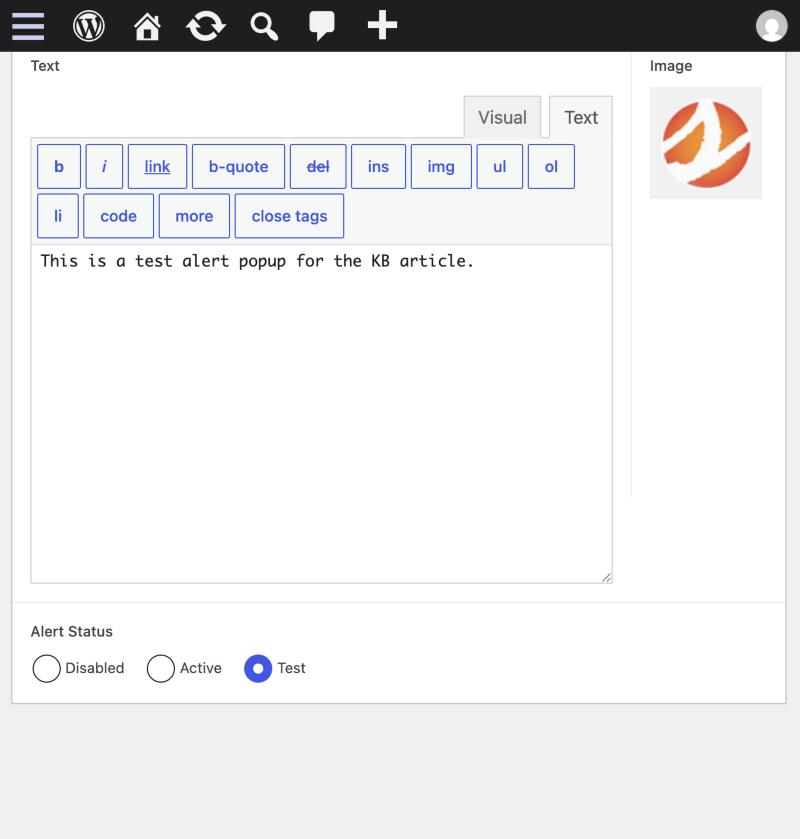
At the bottom of the Alert box, pick one of the three Alert Status options:
- Test — the alert only shows to you while you are logged in, so you can check how it looks without visitors seeing it.
- Active — the alert shows to everyone who visits your website.
- Disabled — the alert is switched off and not shown to anyone.
4
Update and check it
- Click Update (top right of the page) to save.
- While the status is Test, visit your website while logged in to preview the alert.
- When you are happy with it, change the status to Active, click Update again, and check it in a private/incognito window to see what visitors see.
Warning
Visitors who are not logged in will not see an alert that is set to Test. It has to be set to Active before it goes live. 5
Take the alert down
When the alert is no longer needed, set the Alert Status to Disabled and click Update. There is no end date, so it will keep showing until you switch it off.
If you have set it to Active and visitors still cannot see it, clear the site cache. If it still does not show, contact Innermedia support.
Completed
If you are still experiencing issues, our support team is here to help.
Was this article helpful?