INNERMEDIA
Contact Support
Support Base
Pages & Content
Update the Banner Image on a Page
Step 0 of 4 completed
1
Open the page and find the Banner box
- Go to Pages and edit the page you want to change.
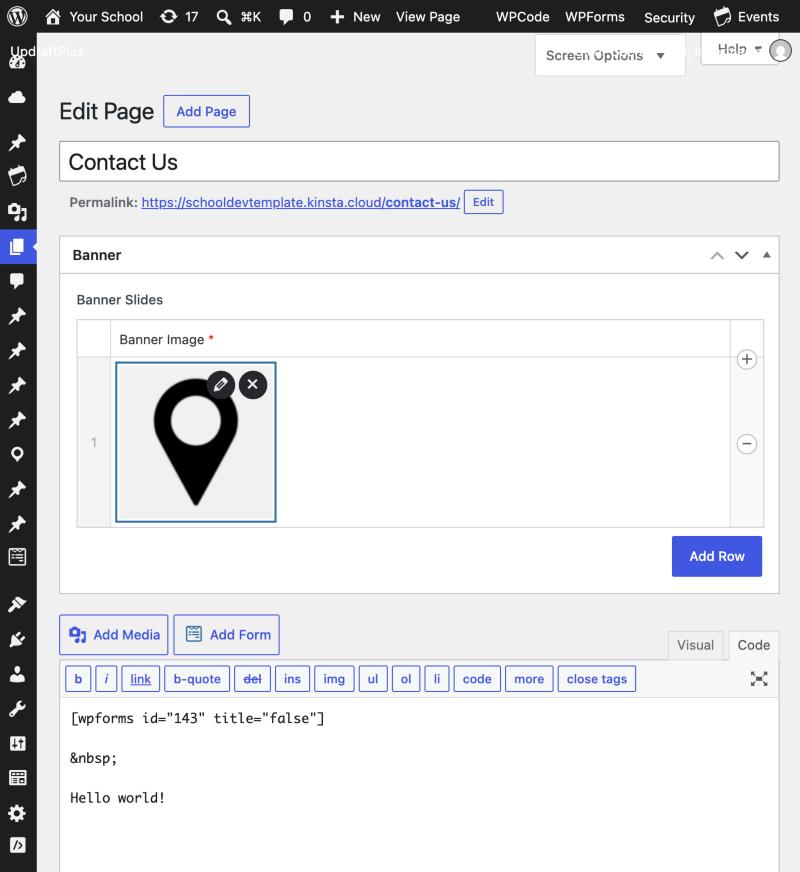
- Above the main content editor, you’ll see a Banner box with a Banner Slides table.
2
Remove the current image
- Hover over the existing banner image and two icons will appear: a pencil (edit the image’s details) and an X (remove it from this banner slide).
- Click the X to remove the current image.
Pro Tip
Removing the image here only clears it from this banner slide — it doesn't delete the file itself from your Media Library. 3
Add the new image
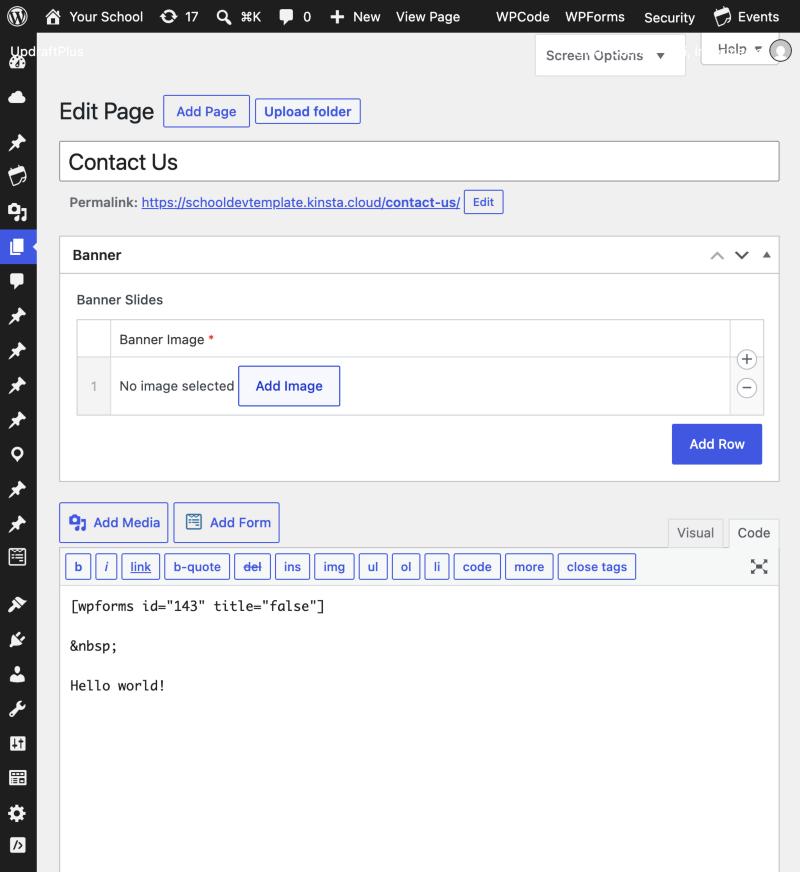
- With the image removed, an Add Image button appears in its place. Click it.
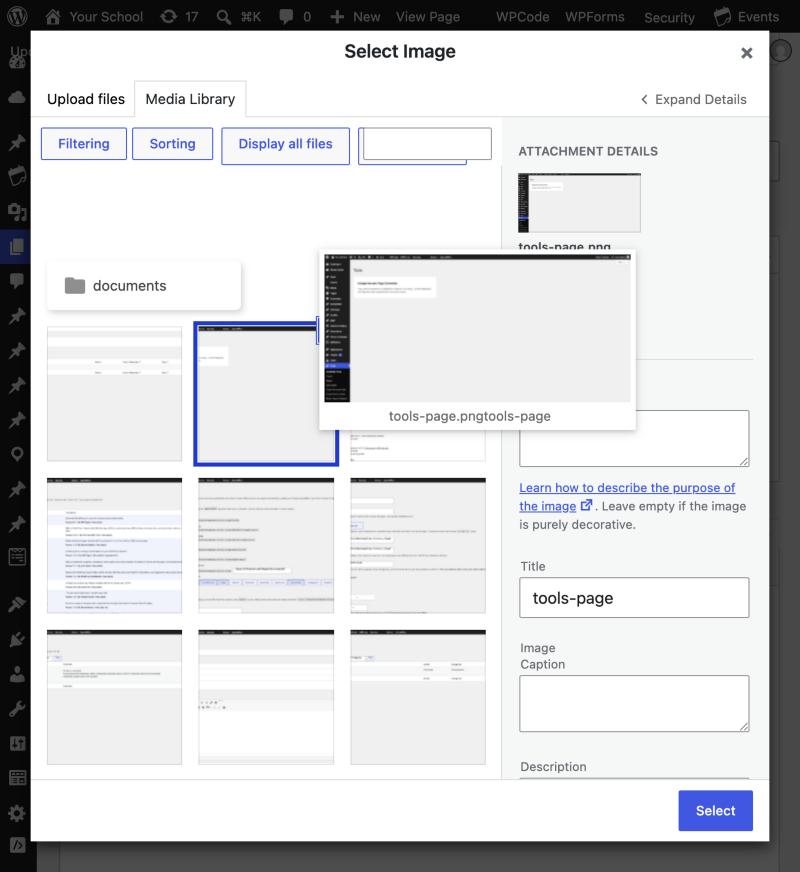
- In the Select Image window, either choose an existing file from your Media Library or use the Upload files tab to add a new one.
- Click Select once you’ve picked the image.
4
Confirm and update
- Check the new image has appeared in the Banner Slides row.
- Click Update in the top-right corner to publish the change.
- View the live page to confirm the new banner displays correctly.
Warning
Banner images are usually wide, short crops (e.g. 1920 x 600px) — a very tall or square image may look stretched or cropped oddly. Use a similarly-shaped image where possible. Completed
If you are still experiencing issues, our support team is here to help.
Was this article helpful?